
Installing and configuring the MetaMask application
The MetaMask wallet app is available for download on Chrome, Firefox, iOS and Android. For this tutorial, we will use the Firefox version, but the instructions will be very similar for all platforms.
Firstly, you must access the MetaMask download page. So, select the platform you are using and follow the steps to complete the installation on your device. Easy!
Then continue the installation through the application itself. Proceed and click on Create a Wallet. Write down the backup seed phrase somewhere secret (preferably on a device that is not connected to the Internet). Without this phrase, your funds cannot be recovered if your device is damaged or lost. On the next page, confirm that you have already written/saved the seed phrase.
Ready! You should now see your wallet, ready to send and receive funds.
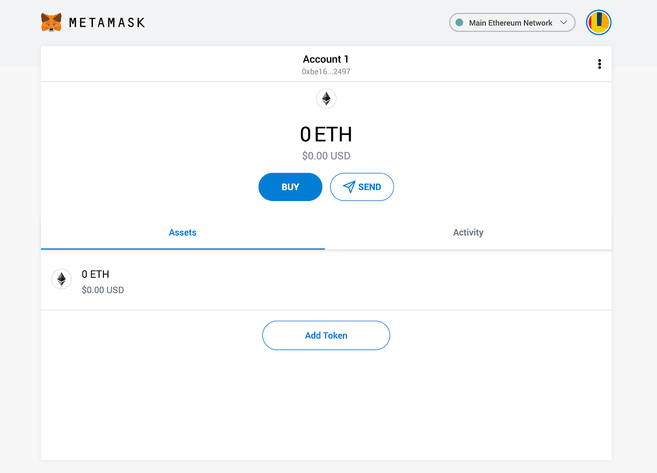
MetaMask wallet home screen.
Setting up the wallet
You may have already noticed that we are still dealing with an Ethereum wallet. In the best case scenario, it will not work with Binance Smart Chain DApps. In the worst case, you could lose funds by sending them to incompatible addresses.
Let's resolve this. We want to adjust the Settings to direct the wallet to Binance Smart Chain nodes.
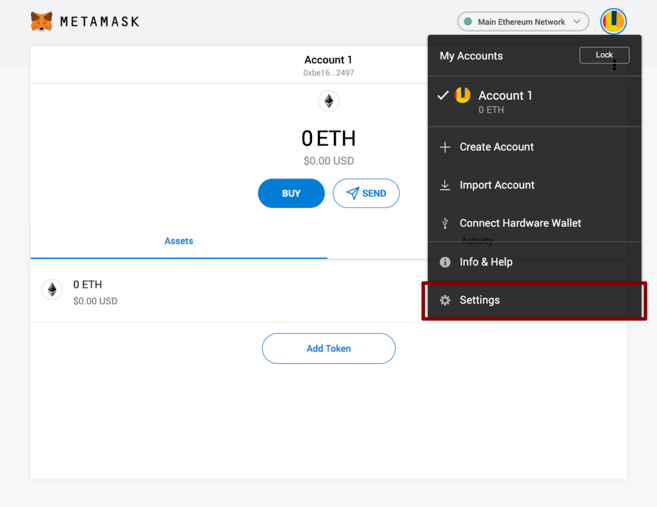
Select Settings from the MetaMask drop-down menu.
On the Settings page, we want to find the Networks menu.
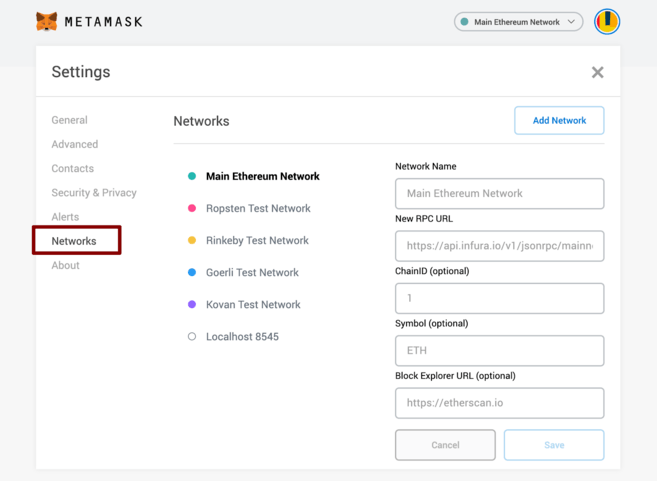
Networks configuration page.
We must click on Add Network in the top right corner to manually add the Binance Smart Chain network – which is not initially integrated with MetaMask. It is important to note that there are two networks that we can use here: the testnet (test network) or the mainnet (main network). Below are the parameters that should be used for each.
Mainnet (this is the one you are probably looking for)
Network Name: Smart Chain
New RPC URL: https://bsc-dataseed.binance.org/
ChainID: 56
Symbol: BNB
Block Explorer URL: https://bscscan.com
Testnet
Network Name: Smart Chain - Testnet
New RPC URL: https://data-seed-prebsc-1-s1.binance.org:8545/
ChainID: 97
Symbol: BNB
Block Explorer URL: https://testnet.bscscan.com
In this tutorial, we'll use testnet, but you'll probably want to use mainnet. We recommend adding both if you plan to use MetaMask to transfer BNB or Binance Smart Chain tokens.
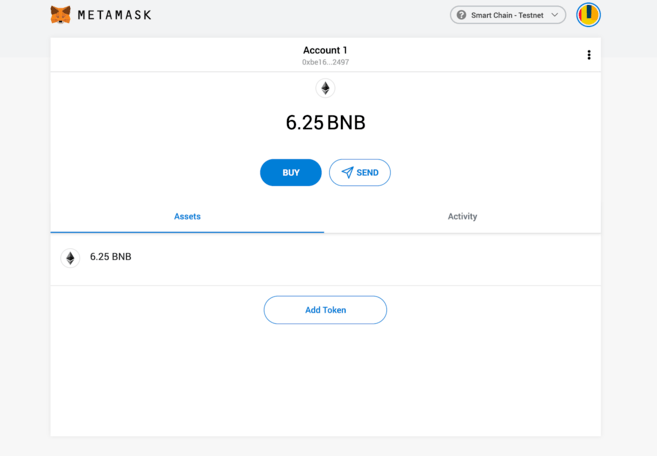
After Saving the Network and returning to the main page, you will notice two things: the network has automatically changed to the one you just added and the units are no longer denominated in ETH, but in BNB.

We connect to the testnet, but you will probably connect to the mainnet.
Making transactions (on testnet)
Don't be fooled by the Ethereum logo – we tune into the BSC testnet. Now, we need some funds. Hover over Account 1 and click to copy its address to the clipboard. Let's access the Binance Smart Chain Faucet and paste the address into the form.
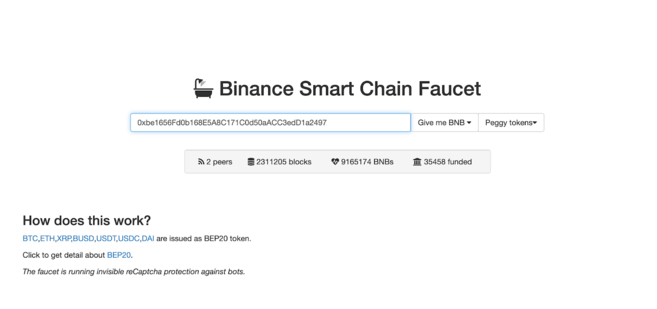
Let's get rich.
Peggy Coins may be of interest if you are testing an application with support for BEP-20 tokens. Basically, they are tokens issued on the Binance Smart Chain that are “pegged” to assets on other chains (such as BTC, XRP, USDT, etc.), that is, they are traded at the same prices.
For now, let's use BNB. Click the Give me BNB dropdown and select the amount you want to receive. You may need to wait a few minutes, but soon, the funds will appear in your testnet wallet.
Our wallet with the funds received.
Now, we will transfer the funds to demonstrate how it works. We took a random address from the BscScan Testnet to which we will donate the funds. Proceed and click Send.
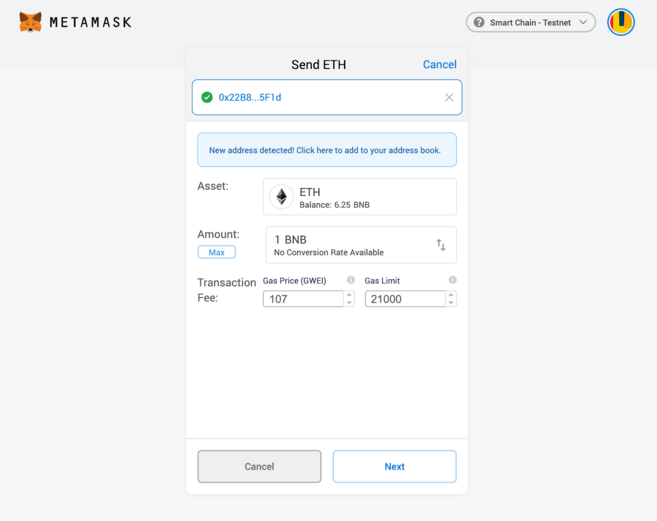
You can ignore the Ether-related parts. This is where you can manually adjust the rate when necessary.
We made a transaction of 1 BNB. We'll leave the fees intact and click Next. Here, we have another chance to check the transaction data – if everything is correct, click Confirm. And ready! You will receive a notification informing you when the transaction is complete.
Final considerations
MetaMask has been the gateway to the vast Ethereum universe. However, with minimal effort, anyone can set it up to direct transactions to the Binance Smart Chain. This allows users to build on the years invested in developing MetaMask, making it an indispensable tool for anyone interacting with decentralized applications (DApps).


