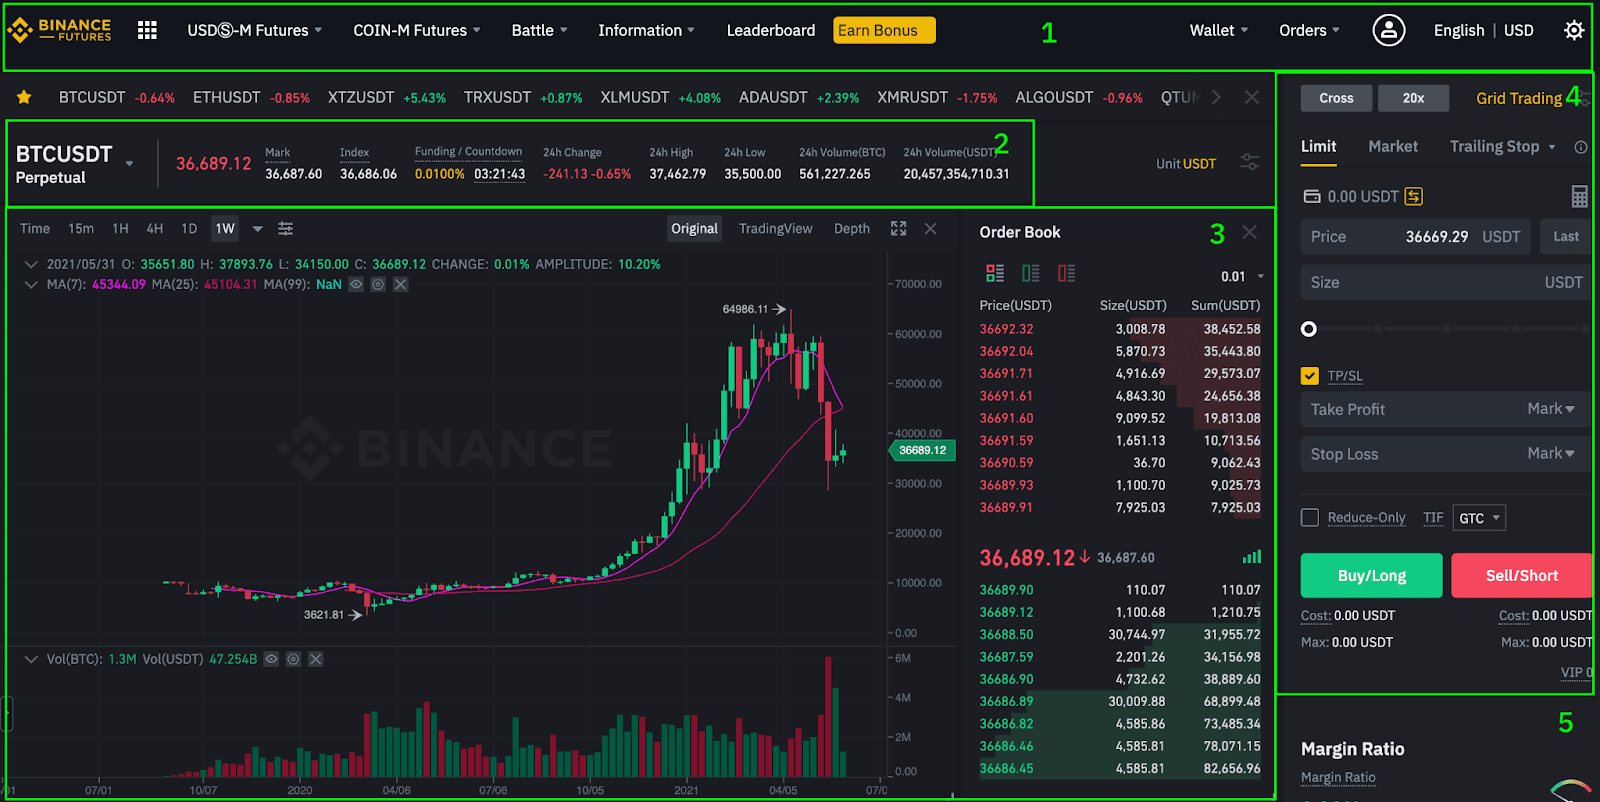
1. The menu section contains links to other Binance pages, such as COIN-M Futures, Battle, Leaderboard and Spot. The [Information] tab contains links to Futures FAQ, funding rate, index price, and other market data.
Additionally, you may access your Binance account, including your Futures and Spot wallets and order history. You can simply monitor your wallet balances and orders across the whole Binance ecosystem.
2. In this area, you access contract-related information such as:
3. This area displays a price chart of the chosen contract. You can switch between the Original or the integrated TradingView chart. On the right, you’ll get a real-time display of the order book data. You can adjust the accuracy of the order book in the dropdown menu on the top right corner of this area (0.01 by default).
4. This is your order entry panel. Place orders according to the various order types available on Binance Futures. For starters, you can select a buy-limit or buy-market order to purchase for your first crypto futures contract. This is also where you can switch between Cross Margin and Isolated Margin. Adjust your leverage by clicking on your current leverage level (20x by default).
5. This is where you can check your available assets, deposit, and buy more crypto. This is also where you can view information relating to the current contract and your positions. Be sure to keep an eye on the Margin Ratio to prevent liquidations.
By clicking on [Transfer], you can transfer funds between your Futures Wallet and the rest of the Binance ecosystem.
Note: Whenever you see an arrow on the bottom right corner of a module, that means you can move and resize that element. This way, you can easily create your own custom interface layout!