

Dear community members, We hope that you are well when you receive this letter. We are writing this letter to provide you with the latest information and guidance on ORIGYN upgrades and migrations to follow up on our previous communication.
ORIGYN has begun a major transformation, moving to a Service Nervous System (SNS) on the Internet Computer Protocol (ICP), marking a new chapter in its journey towards decentralized governance and adopting a new token standard, ICRC-2.
This strategic step is more than just an infrastructure change, it is committed to enhancing security, transparency, and community-driven decision-making, and is also guaranteed by the robustness of the Internet Computer blockchain.
What steps do token holders need to follow to migrate?
With the introduction of new governance and token standards, all token holders will need to migrate their old tokens to the new tokens at a 1:1 ratio.
To simplify this process, ORIGYN deployed an interface directly on the ORIGYN dashboard that allows everyone to independently perform the migration in a few simple steps:
dashboard.origyn.com
Please visit the dashboard and follow the process as described, if you need more information you can check out the User Guide or watch the video at the beginning of the article for a full tutorial.
【Tutorial】How to withdraw tokens from the old OGY governance
In order to withdraw your tokens from old governance you will need to follow the following steps.
1. Access the old OGY dashboard:
governance.origyn.network
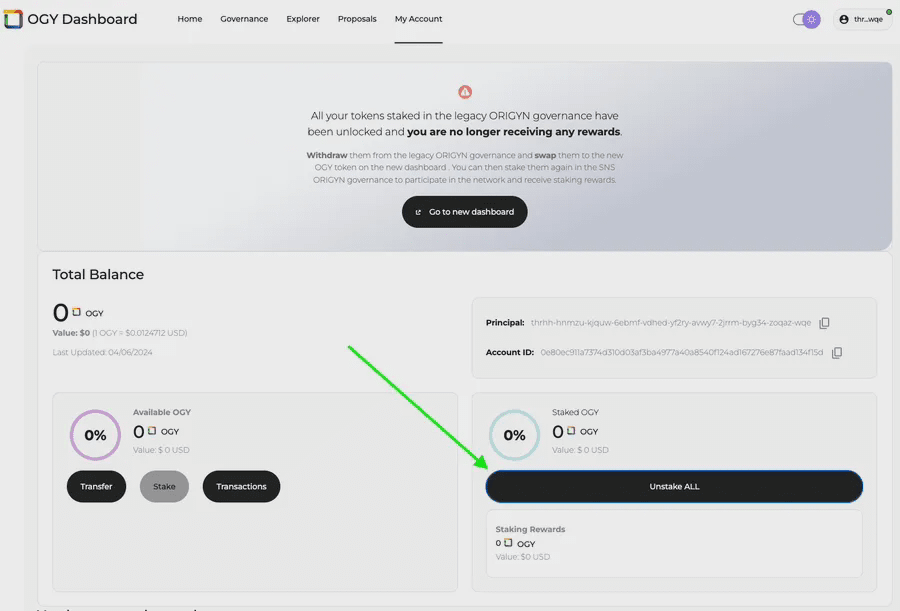
2. Log in to your account and navigate to your account page
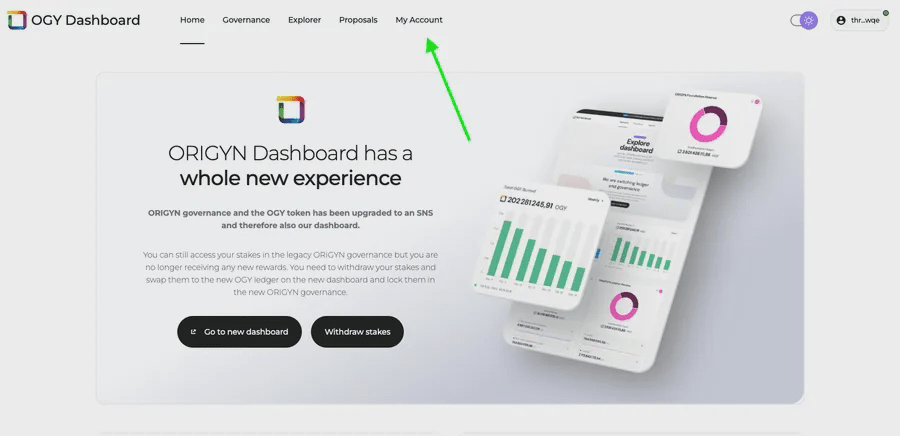
3. Click “Unstake All” to unstake all current tokens from the old governance
⚠️ Important for Internet identity users!!
If you are using Internet Identity, you will need to transfer your tokens from the old ORIGYN dashboard to the new ORIGYN dashboard as your Principal has changed and all other wallets will only need to log in to the new ORIGYN dashboard to access their tokens.
1. In order to redeem these OGY tokens for new tokens, you need to send them to your account ID on the new ORIGYN dashboard, to do this, log in to the new ORIGYN dashboard and copy your account ID:
dashboard.origyn.com
2. Transfer your tokens by clicking "Transfer" on the old dashboard and pasting your account ID and amount in the corresponding fields
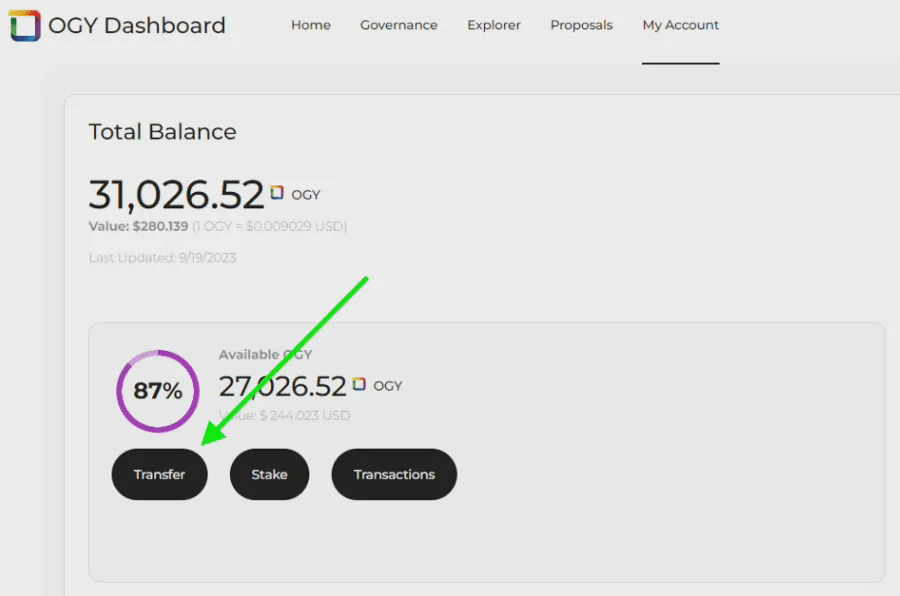
You should now be able to see your balance on your new ORIGYN dashboard and be ready to follow the next step to swap your tokens.
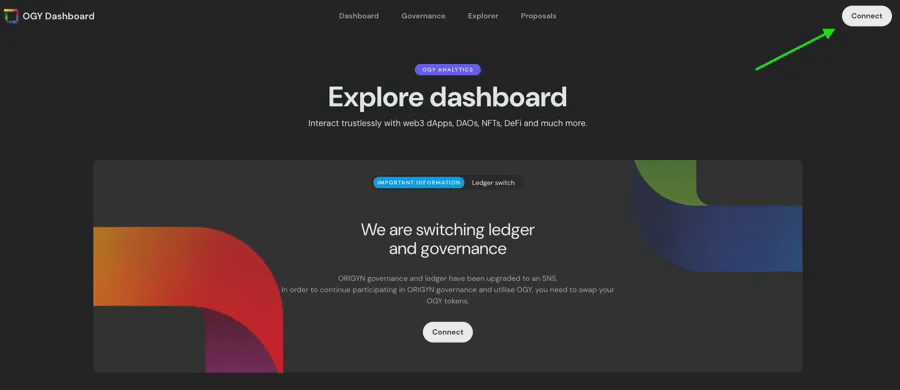
【Tutorial】How to exchange old OGY for SNS OGY
The swap process is done through the new ORIGYN dashboard:
dashboard.origyn.com
1. Log into the dashboard using your preferred wallet
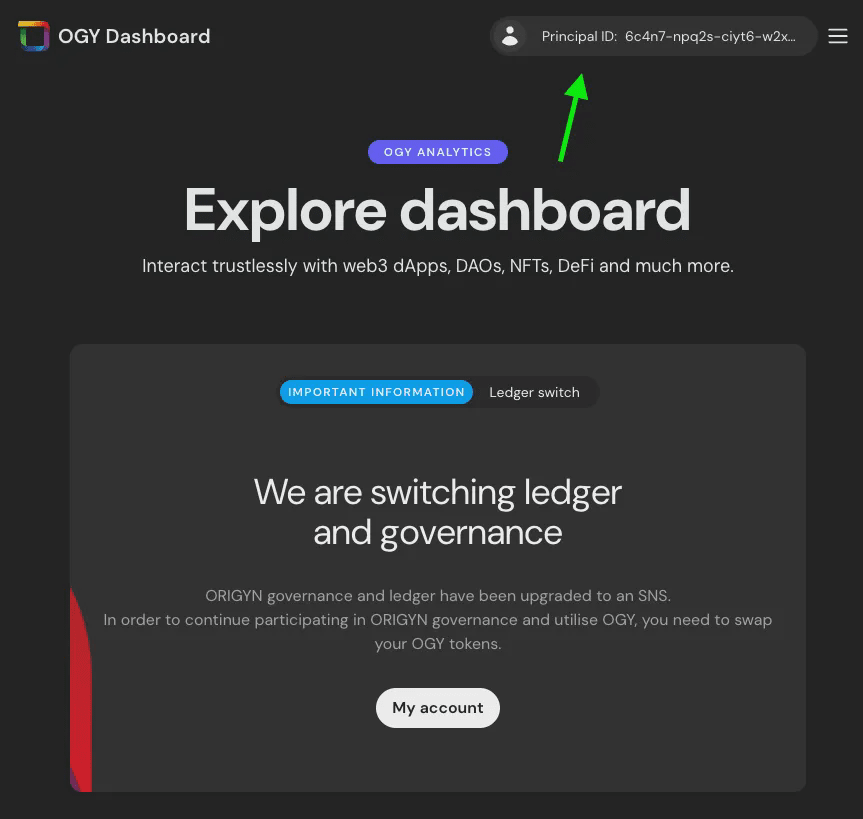
2. Click on your Principal and "My Account" to enter "My Account"
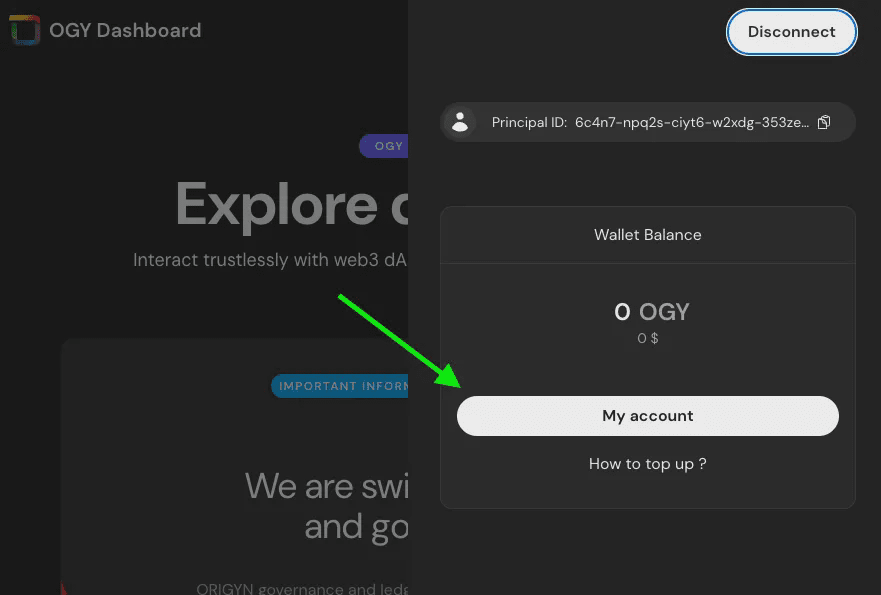
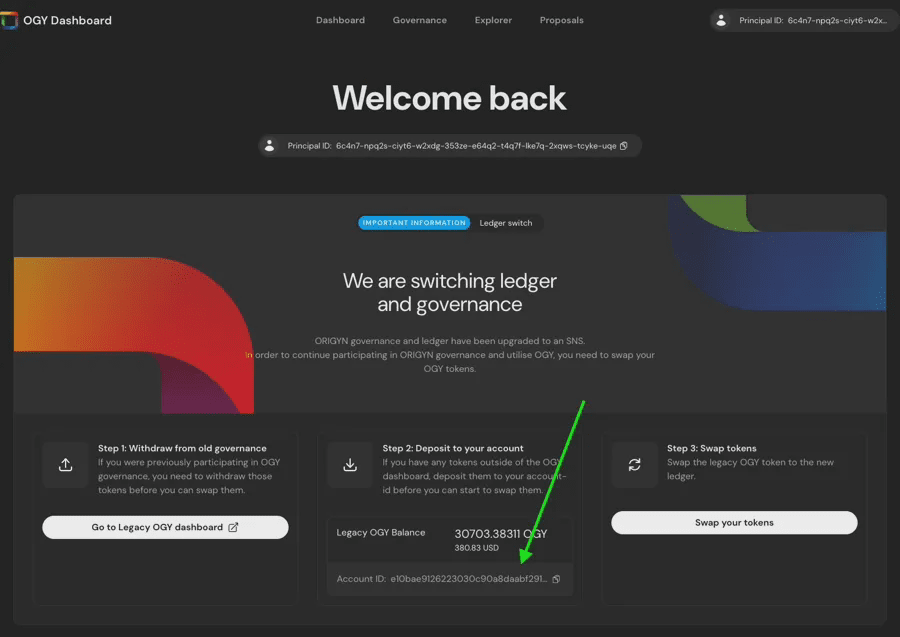
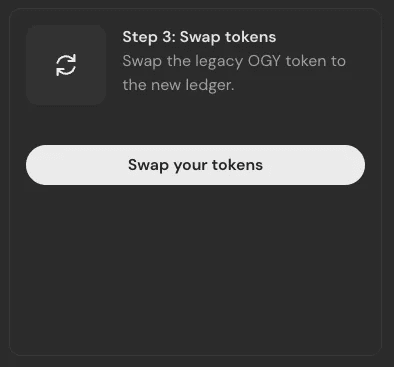
3. You will see the exchange interface. There are three simple steps to exchange tokens:
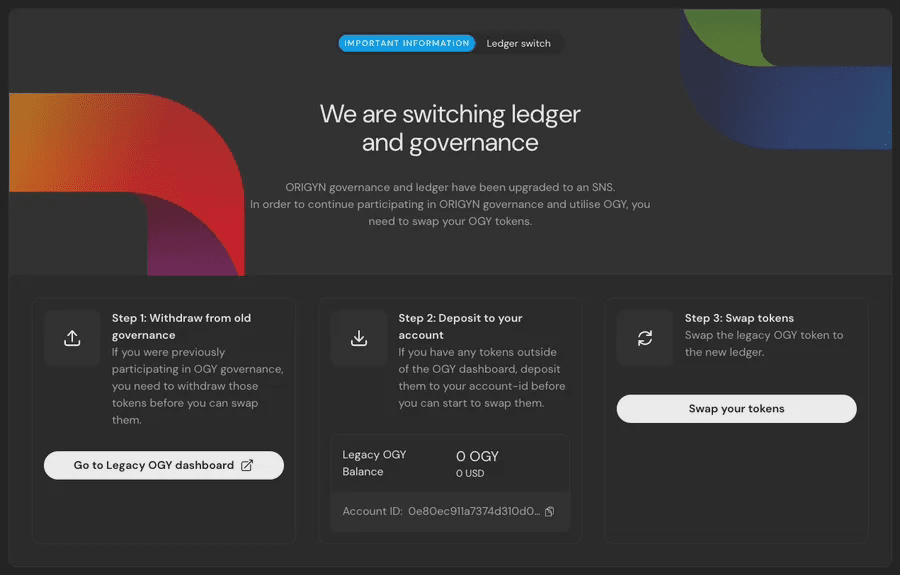
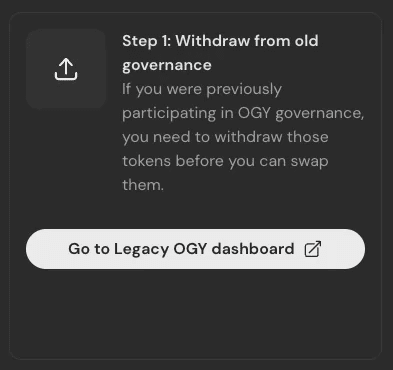
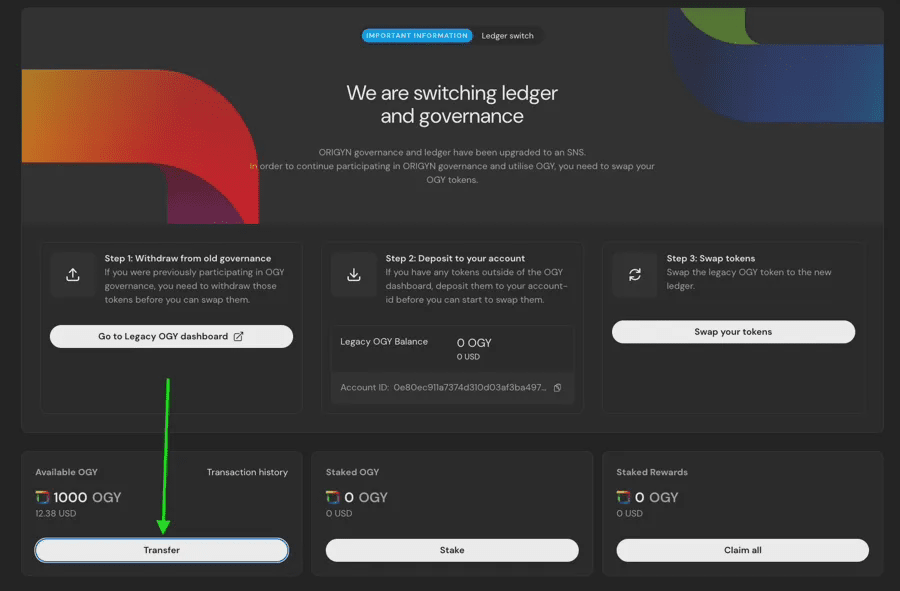
Step 1: If you own any tokens in the old OGY governance, you will need to withdraw those tokens from the old stake, to do this navigate to the old ORIGYN dashboard, click on the “Step 1” button and withdraw your tokens;
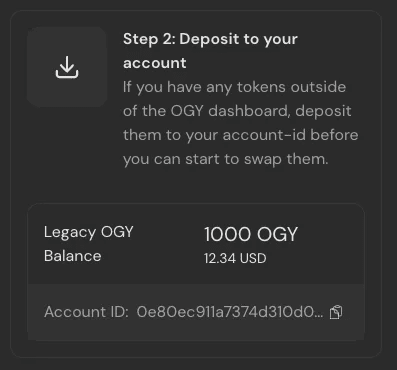
Step 2: Deposit any tokens you wish to swap into your new dashboard. To do this, deposit the tokens into your account ID shown in “Step 2”.
Step 3: Click on “Redeem Your Tokens” in step 3 to redeem your tokens. A pop-up will ask you to confirm the redemption and all tokens in your current balance on the dashboard will be redeemed.
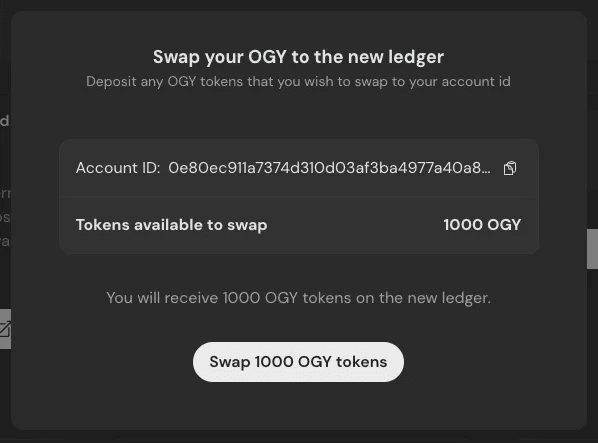
Depending on the wallet you use, you may be asked to confirm your interaction with the ledger and the exchange may take a few seconds, allowing you to sit back and relax while your tokens are exchanged.
4. Once the exchange is successful, you will see them in your "Available OGY" balance
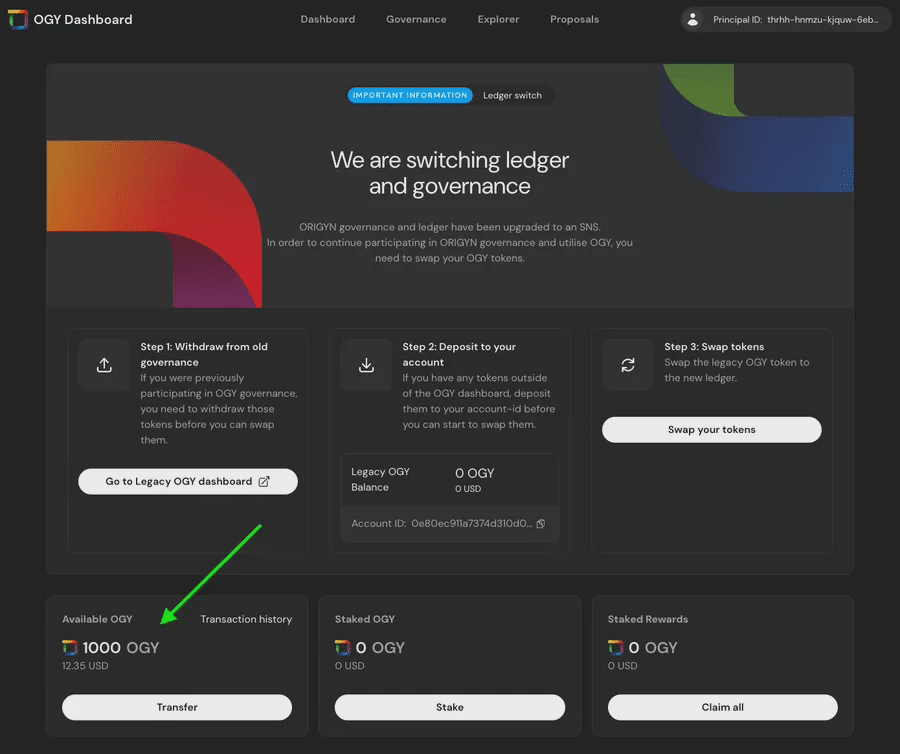
As a next step, you can now stake your OGY tokens in the new ORIGYN governance.
Important note: For holders of old OGY tokens on centralized exchanges, migration will be assisted directly by MEXC and Bitrue. The new OGY token is now available on Sonic, ICPSwap, and IC Lighthouse. In addition, wallets such as Plug, Stoic, Bitfinity, etc. also support the new OGY token.
How do token holders re-stake?
All previously staked OGY have been released to facilitate the migration.
After the migration is complete, everyone will be able to stake the new OGY tokens in the NNS dApp. This step will allow holders to join the governance system of the ORIGYN protocol. By staking, token holders help make decision-making more decentralized. In addition, voting activities can also earn rewards.
The ORIGYN Foundation has successfully migrated and staked its tokens onto the new ledger and committed them to Neurons for a period of 5 years, and those who follow and stake for 5 years using the new OGY dashboard can expect more surprises - stay tuned!
For guidance on how to stake your new OGY tokens, please check out the user tutorial here or refer to the video guide at the end of the article.
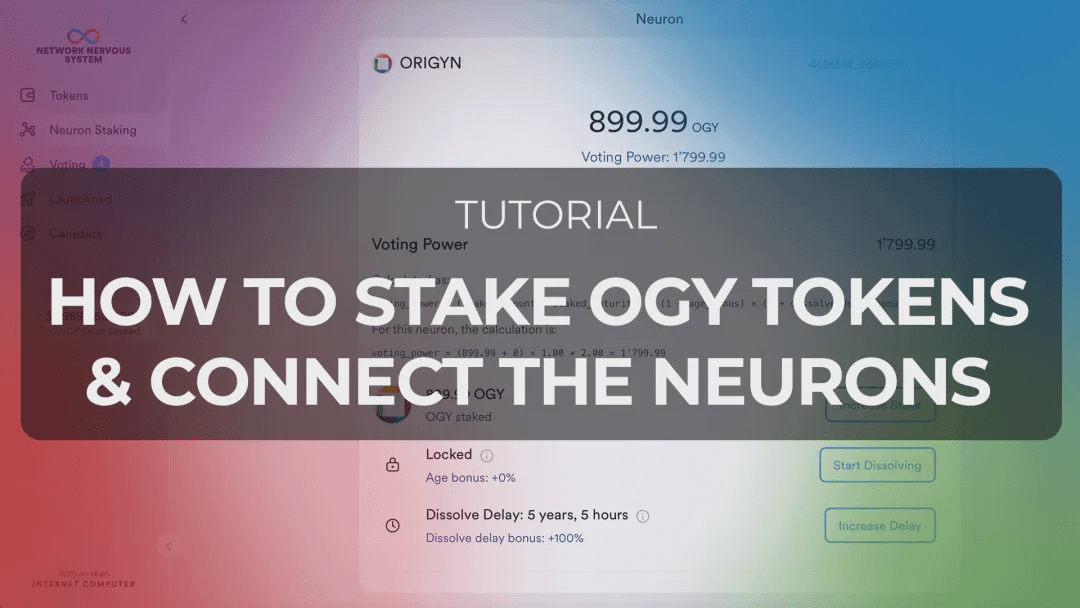
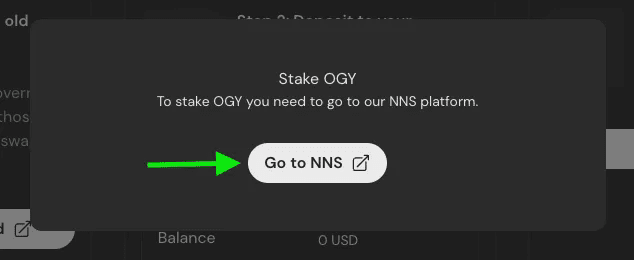
【Tutorial】How to stake OGY tokens
The most convenient way to stake OGY tokens in governance is through the NNS dApp.
The overall steps are as follows:
Transfer your tokens to the NNS dApp;
Stake your tokens in ORIGYN SNS via the NNS dApp.
Specific steps are as follows:
1. Transfer OGY to NNS dApp: If you have tokens on the ORIGYN dashboard, you will need to transfer them to the NNS dApp
① Open NNS dApp

② Log in to NNS dApp using your internet identity
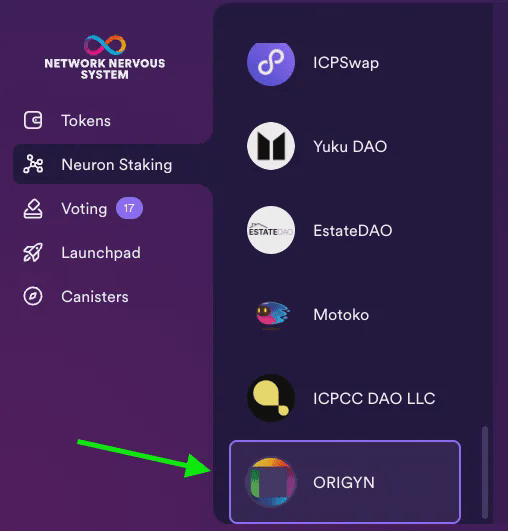
③ Navigate to the “Tokens” tab and select “ORIGYN”
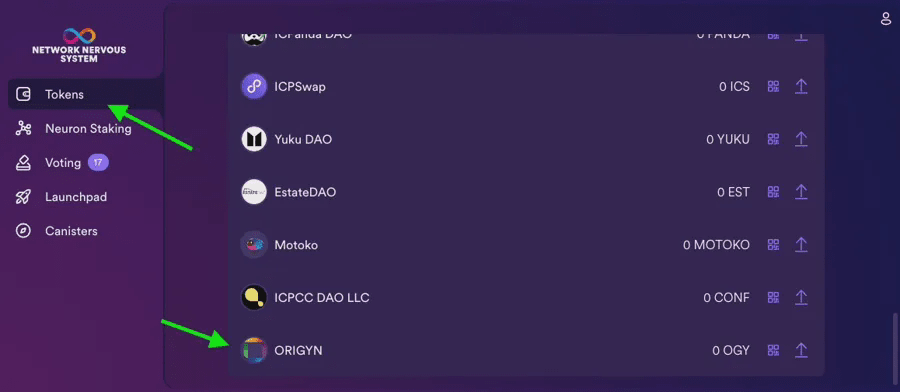
④ Click “Receive” and copy your “OGY Address”
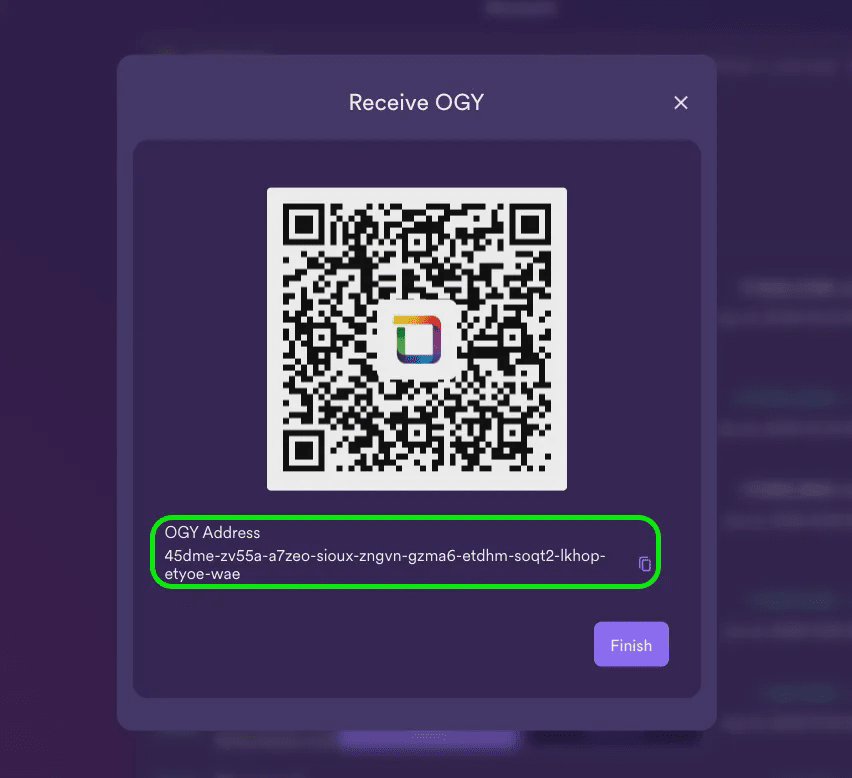
⑤ Return to the ORIGYN dashboard and click on “Transfer” in the available OGY
⑥ Paste your Principal and the amount you want to transfer from NNS dApp
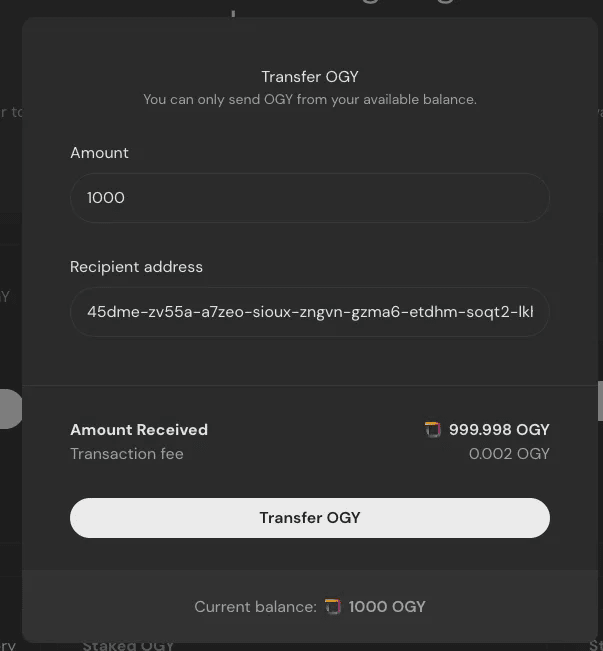
⑦ Click “Transfer OGY”. Depending on the wallet you use, you may need to approve the interaction with the ledger.
⑧ Your OGY tokens should now be in your OGY balance on the NNS dApp
2. Stake new tokens on the NNS dApp
① Return to NNS dApp
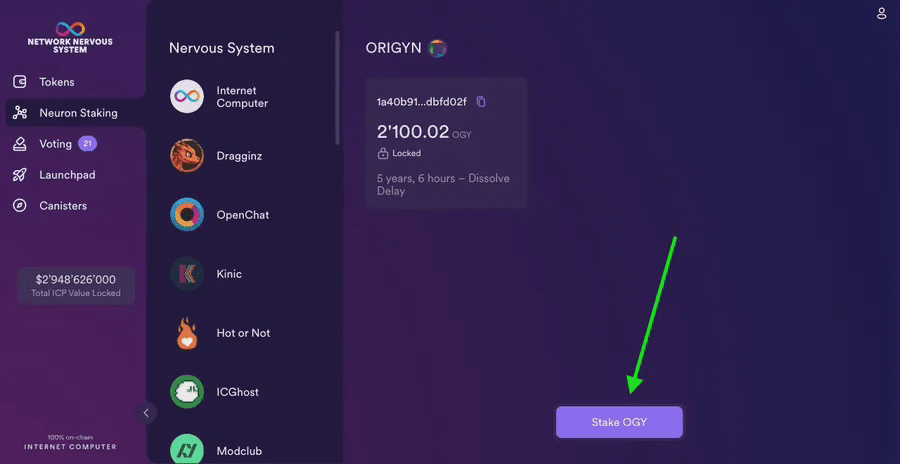
② Navigate to the “NeuroStaking” tab and go to “ORIGYN”
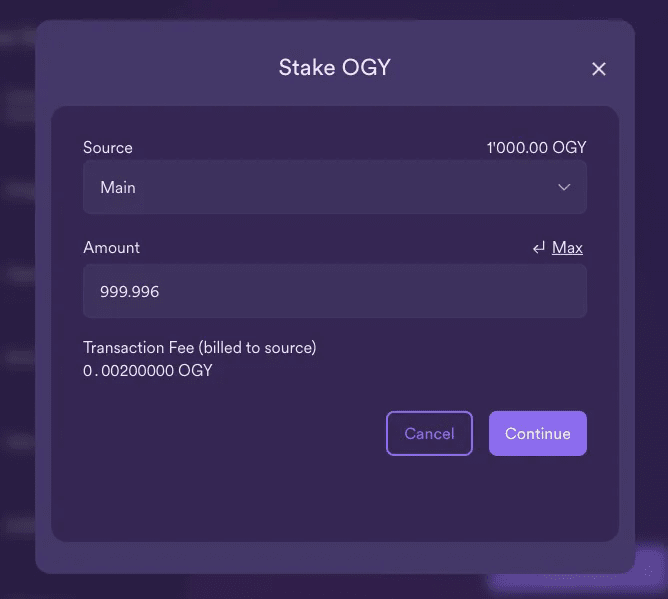
③ Click "Pledge OGY" and confirm the amount you want to pledge, then click "Continue"
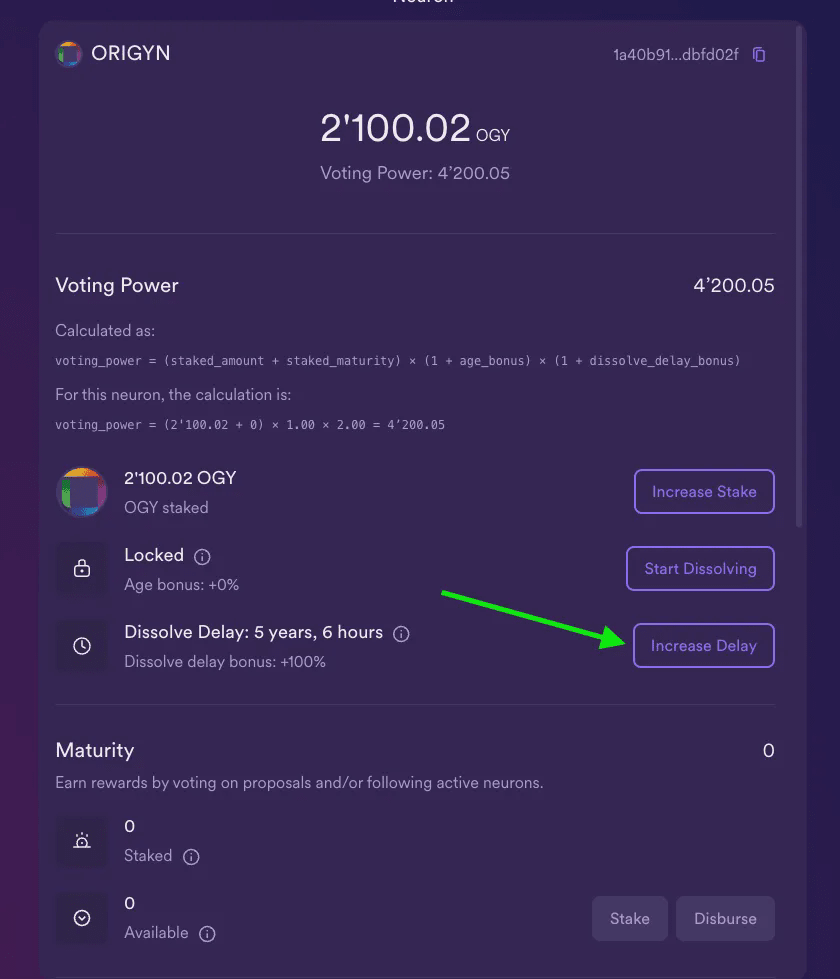
④ As a final step, you need to configure the dissolution delay for your new neuron. Click on the neuron you just created and click “Increase Delay”. You will need to lock your tokens for at least 1 year before you can vote and thus receive any staking rewards.
⑤ If you don’t want to vote on each proposal manually, you can also set your neuron to follow another neuron. You can follow the official team neuron, whose ID is:
85c7658209f1b701aa15727de64ad046787711a29583b53534254b4744e8ba53
Now that you have your Neuron set up, you can add it to your ORIGYN dashboard to receive your staking rewards.
【Tutorial】How to configure Neuron to get staking rewards
To be able to manage Neurons through the ORIGYN dashboard, they need to be configured correctly. Simply add the user Principal on the dashboard as a Hotkey to each Neuron and register it with the dashboard. This will let the dashboard know that the user is the legitimate owner of the Neuron. The following guide explains each step on how to add a Neuron to the dashboard.
💡 Note: You can only add one Neuron to one account, if you want to move a Neuron from one account to another, please remove the Neuron from the old account and delete the old Hotkey.
Since most people use the NNS dApp to manage their neurons, this guide focuses on this workflow.
⚠️ NOTE: When you log into the ORIGYN dashboard using the same internet identity as you use for the NNS dApp, you will receive a different Principal due to the nature of how internet identities work, which is why you are connecting your Neuron to this dashboard via a Hotkey.
Add Neuron Hotkey
1. Log in to the ORIGYN dashboard:
dashboard.origyn.com

2. Navigate to your account page

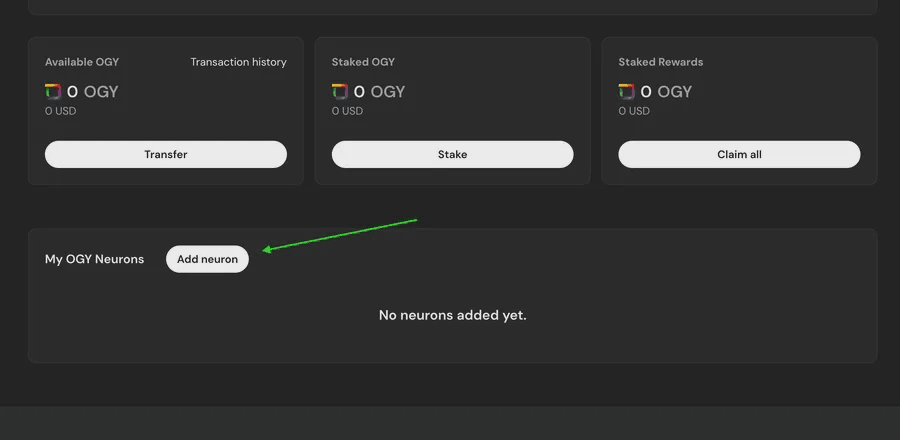
3. Scroll down to the "My OGY Neurons" section and click "Add Neuron"
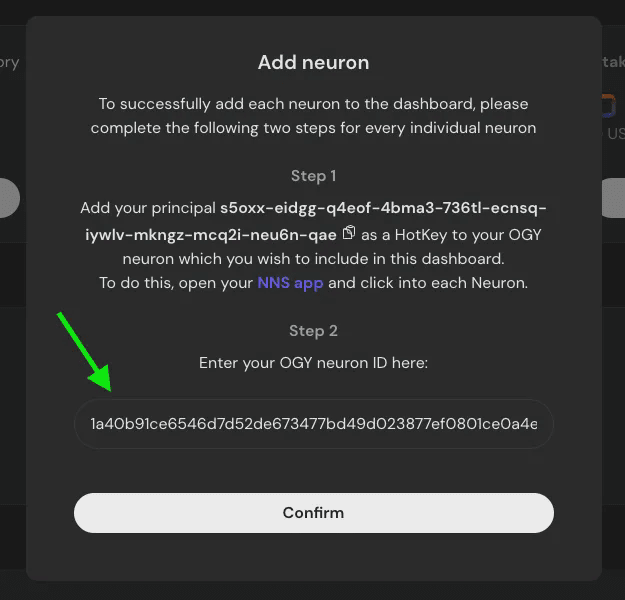
4. A modal will appear showing your Principal, copy your Principal and proceed to the next step
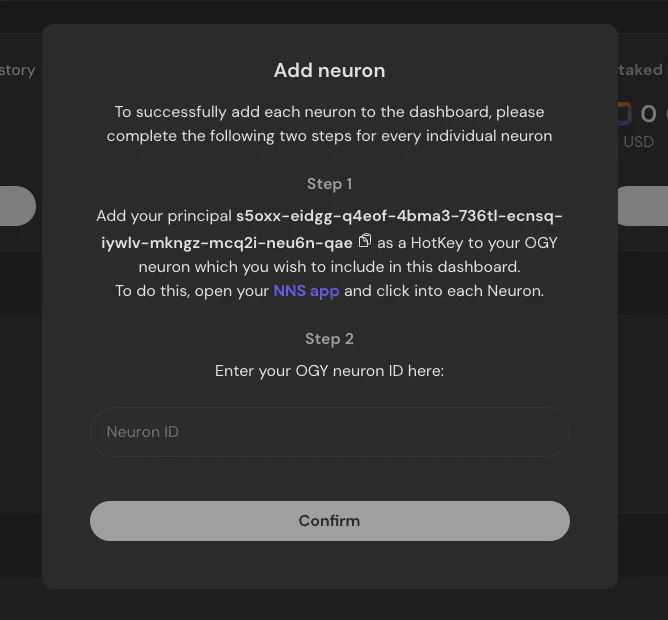
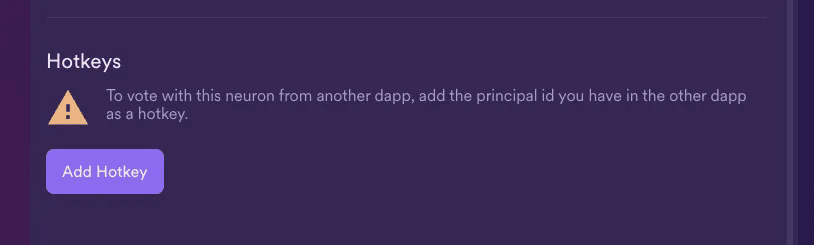
5. Open a new window and log in to the NNS dApp using the internet identity that holds the neuron. Go to the "Neuron Staking" section and select the neuron you want to add. On the neuron page, scroll down to Hotkey and click "Add Hotkey". Enter the Principal you copied in step 4.
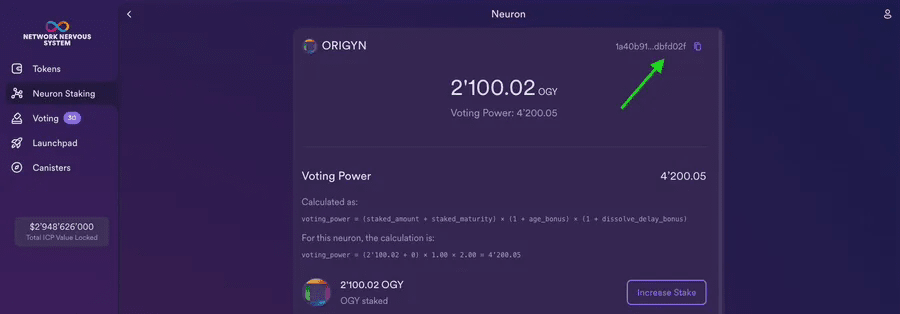
6. Copy your ORIGYN Neuron ID from the NNS dApp
7. Return to the ORIGYN dashboard and paste your Neuron ID into the Pattern field and click Confirm
8. You may need to refresh the page, the neuron should now appear in your list of neurons
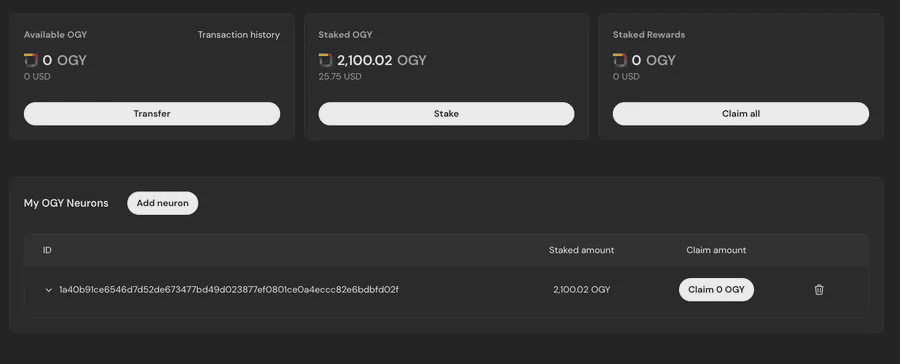
9. If you add multiple neurons, you will see your total OGY amount displayed above the neurons list
See the next section to learn how to claim your rewards.
【Tutorial】How to claim rewards
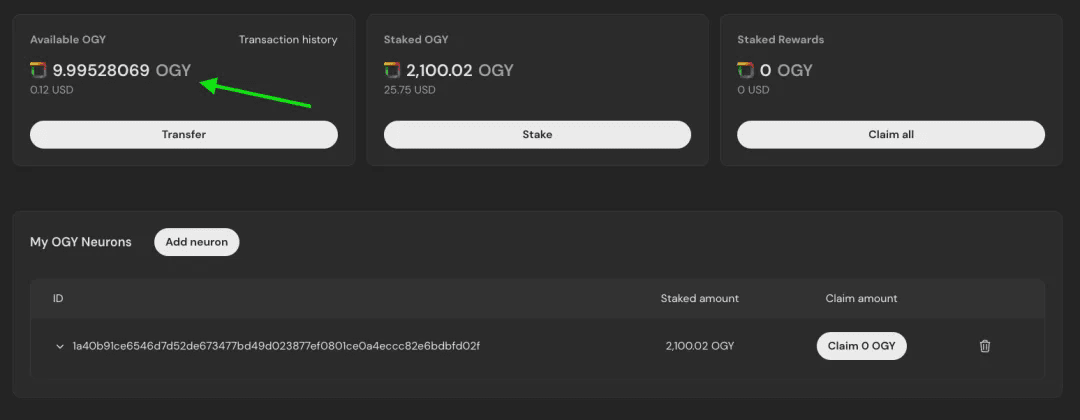
Whenever your Neurons have rewards, they will be shown in the Neuron Table on the ORIGYN Dashboard:
dashboard.origyn.com
Click “Claim XX OGY” to claim the OGY reward for this Neuron (1), or you can click “Claim All” to claim all available rewards for all linked Neurons (2).
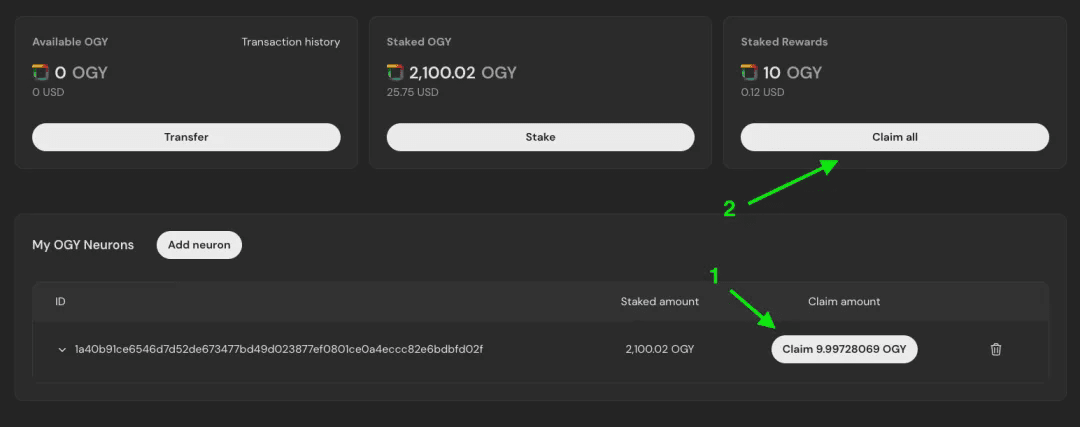
After a few seconds, the received reward will appear in the balance on the same page. You may need to refresh the balance for it to appear.
If you would like to have a video call with the ORIGYN team and a live demonstration of the process, or if you require technical assistance throughout the upgrade process, please feel free to contact us at techsupport@origyn.ch.
All tutorials and documents can be accessed at:
origyn.gitbook.io/origyn
Follow us on Telegram and X for more information and to stay up to date with the latest developments.

#ORIGYN #OGY #DAO #RWA赛道 $BTC $ETH $ICP
IC content you care about
Technology Progress | Project Information | Global Activities

Collect and follow IC Binance Channel
Get the latest news


